murmrrr

Install guide

It takes a couple of minutes. The warnings are the only odd bit, and here's how to get past each one.

Windows Mac

Windows

  1. Download

    Click the Windows card on the download page, or your download link after buying.
    Download: Click the Windows card on the download page, or your download link after buying.
  2. "Windows protected your PC"

    This is SmartScreen. It appears because murmrrr isn't code-signed yet.
    "Windows protected your PC": This is SmartScreen. It appears because murmrrr isn't code-signed yet.
  3. More info

    Click More info, under the message.
    More info: Click More info, under the message.
  4. Run anyway

    A Run anyway button appears. Click it.
    Run anyway: A Run anyway button appears. Click it.
  5. The installer

    It installs in a few seconds, just for you, with no admin prompt.
    The installer: It installs in a few seconds, just for you, with no admin prompt.
  6. First launch

    A welcome window opens with your hotkey and a box to practise in.
    First launch: A welcome window opens with your hotkey and a box to practise in.
  7. Speech model

    murmrrr downloads its speech model once (190 MB). With an NVIDIA card it also fetches the high-accuracy model in the background (about 1.2 GB), and you can dictate while it does.
    Speech model: murmrrr downloads its speech model once (190 MB). With an NVIDIA card it also fetches the high-accuracy model in the background (about 1.2 GB), and you can dictate while it does.
  8. Microphone permission

    If Windows is blocking the mic, allow it under Settings > Privacy & security > Microphone.
    Microphone permission: If Windows is blocking the mic, allow it under Settings > Privacy & security > Microphone.
  9. The bar appears

    A small bar sits at the bottom of your screen. That means it's ready.
    The bar appears: A small bar sits at the bottom of your screen. That means it's ready.
  10. Hold Ctrl+Win and talk

    Click in any text box, hold Ctrl+Win, say something, and let go.
    Hold Ctrl+Win and talk: Click in any text box, hold Ctrl+Win, say something, and let go.

Mac

  1. Download

    On the download page, click Download on the Mac card marked Your computer. Not sure which chip you have? Apple menu > About This Mac.
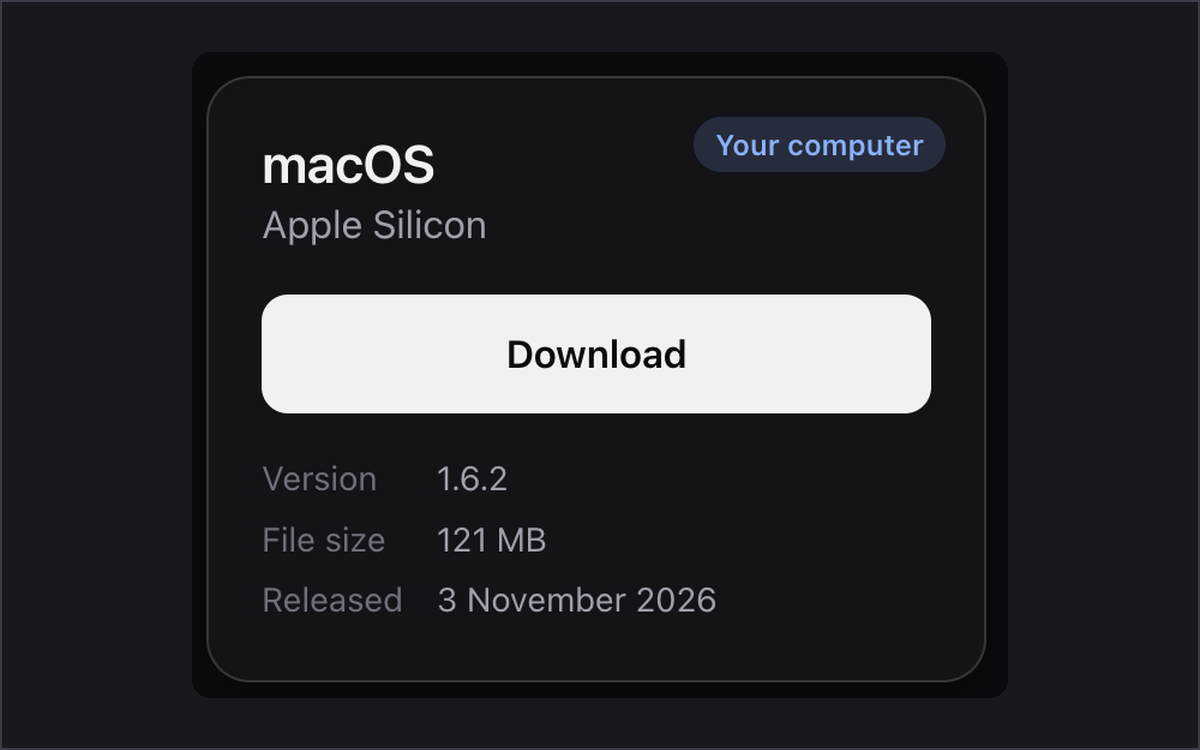
    Download: On the download page, click Download on the Mac card marked Your computer. Not sure which chip you have? Apple menu > About This Mac.
  2. Open the DMG

    When the download says Done, click it, or double-click the .dmg file in your Downloads folder.
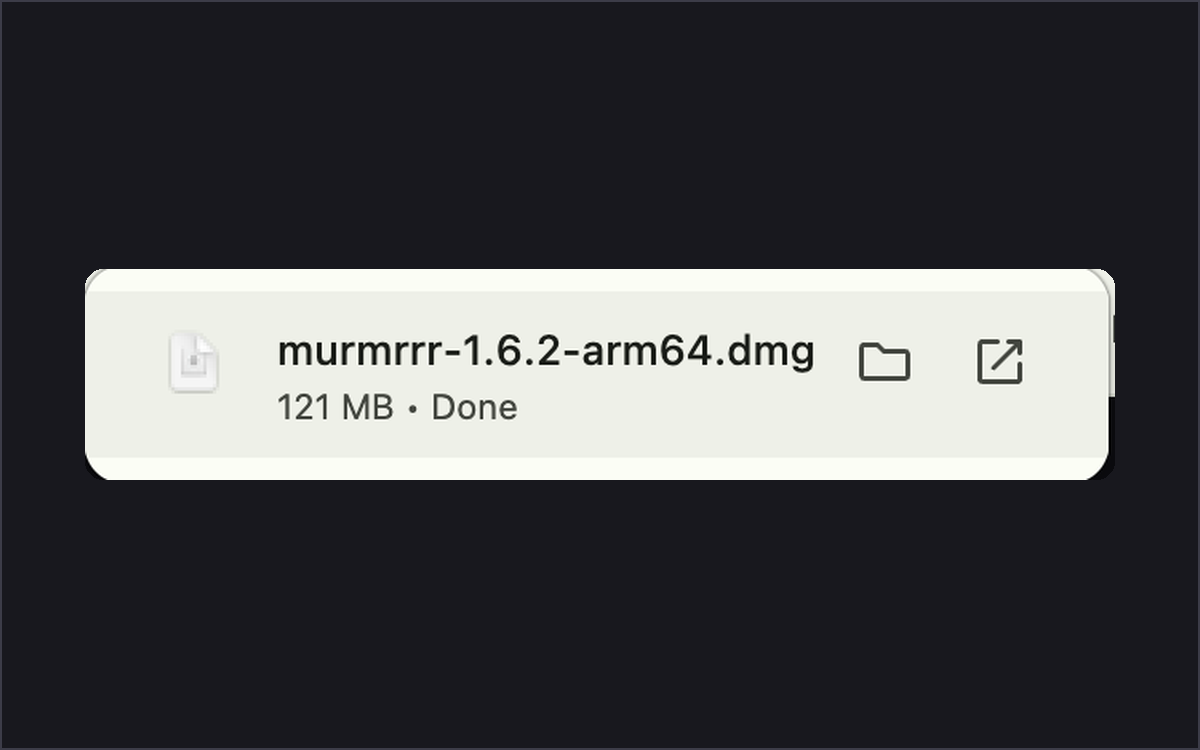
    Open the DMG: When the download says Done, click it, or double-click the .dmg file in your Downloads folder.
  3. Drag to Applications

    Drag murmrrr onto the Applications folder.
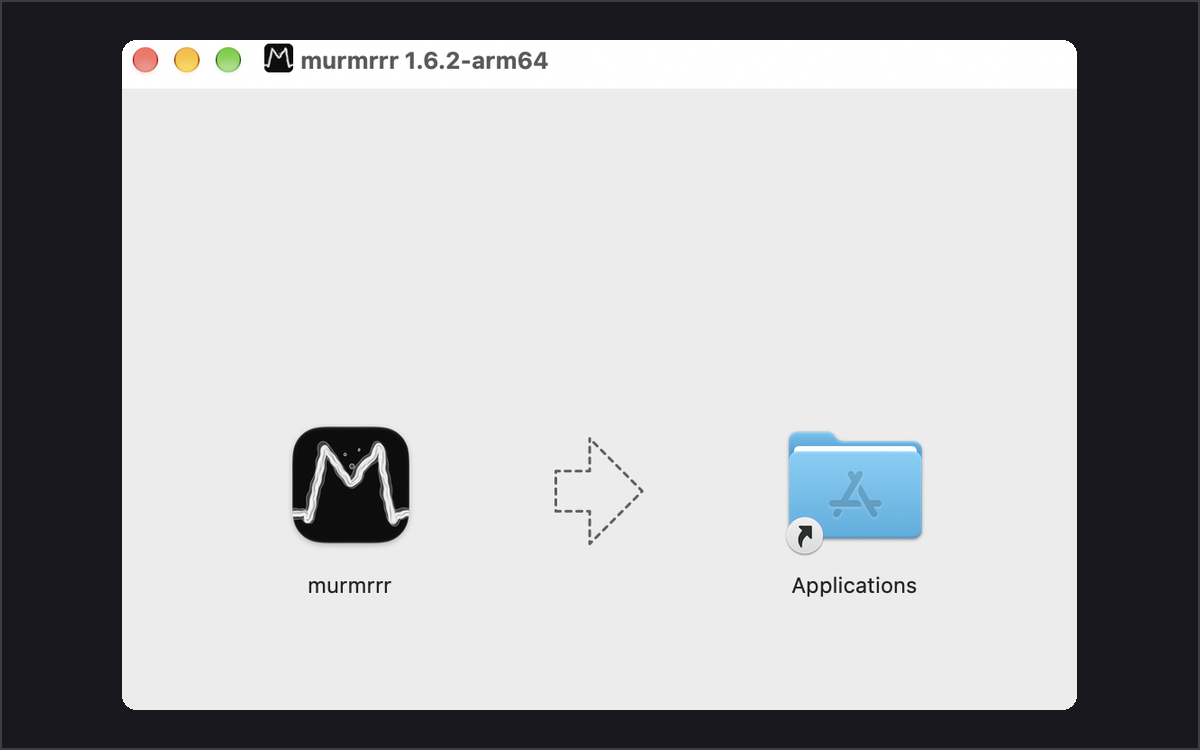
    Drag to Applications: Drag murmrrr onto the Applications folder.
  4. "Not Opened"

    The first time you open it, macOS says it couldn't check murmrrr, because it isn't notarised by Apple yet. Click Done, not Move to Bin.
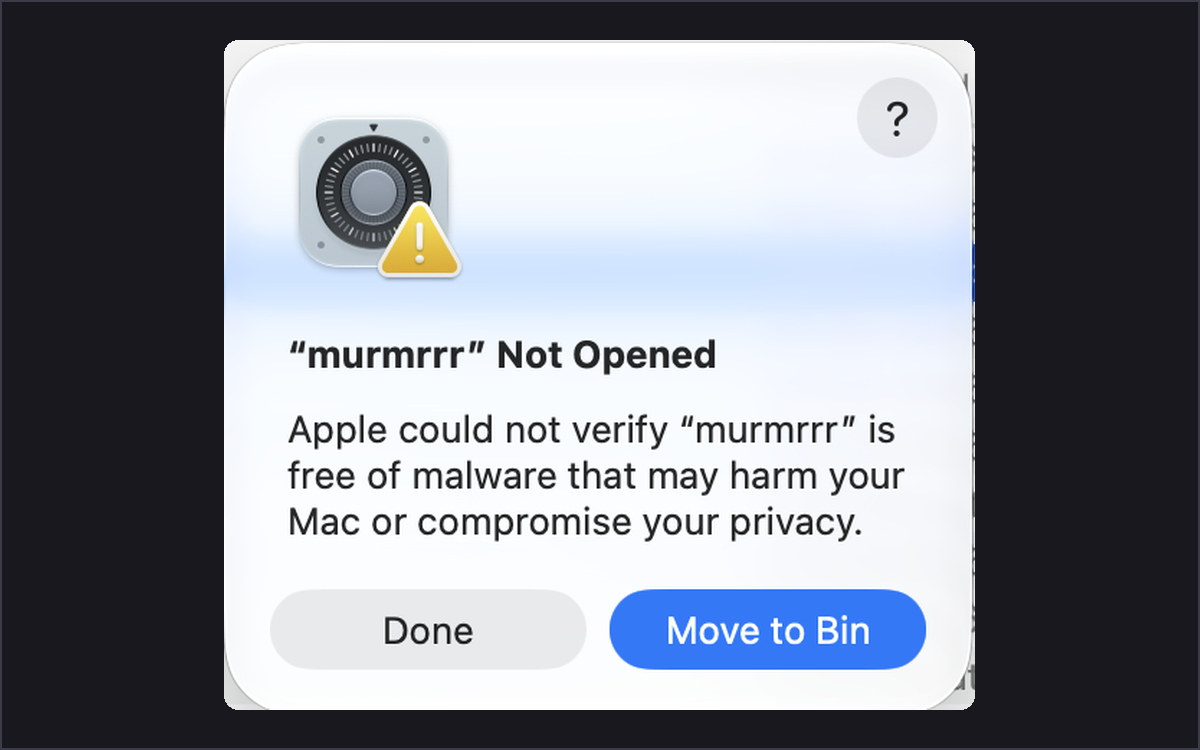
    "Not Opened": The first time you open it, macOS says it couldn't check murmrrr, because it isn't notarised by Apple yet. Click Done, not Move to Bin.
  5. System Settings > Privacy & Security

    Open System Settings and go to Privacy & Security. Scroll down to Security, where it says “murmrrr” was blocked to protect your Mac.
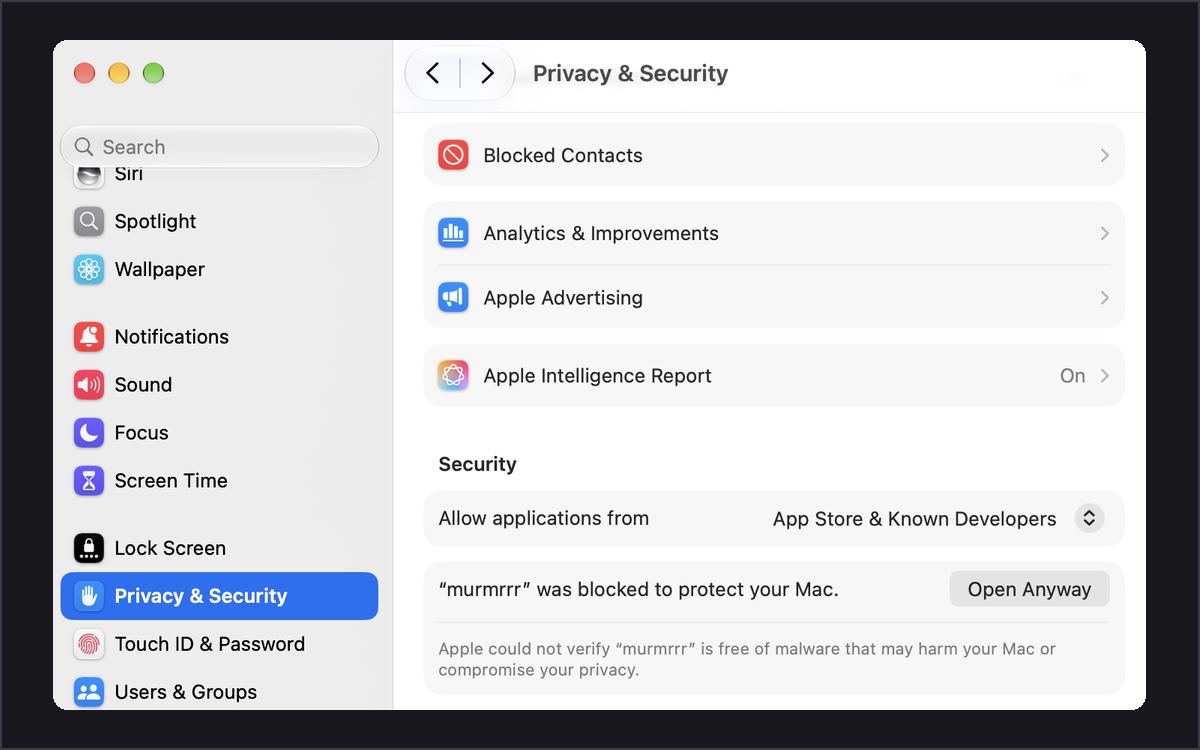
    System Settings > Privacy & Security: Open System Settings and go to Privacy & Security. Scroll down to Security, where it says “murmrrr” was blocked to protect your Mac.
  6. Open Anyway

    Click Open Anyway next to that message. In the box that appears, click Open Anyway again, then confirm with Touch ID or your password.
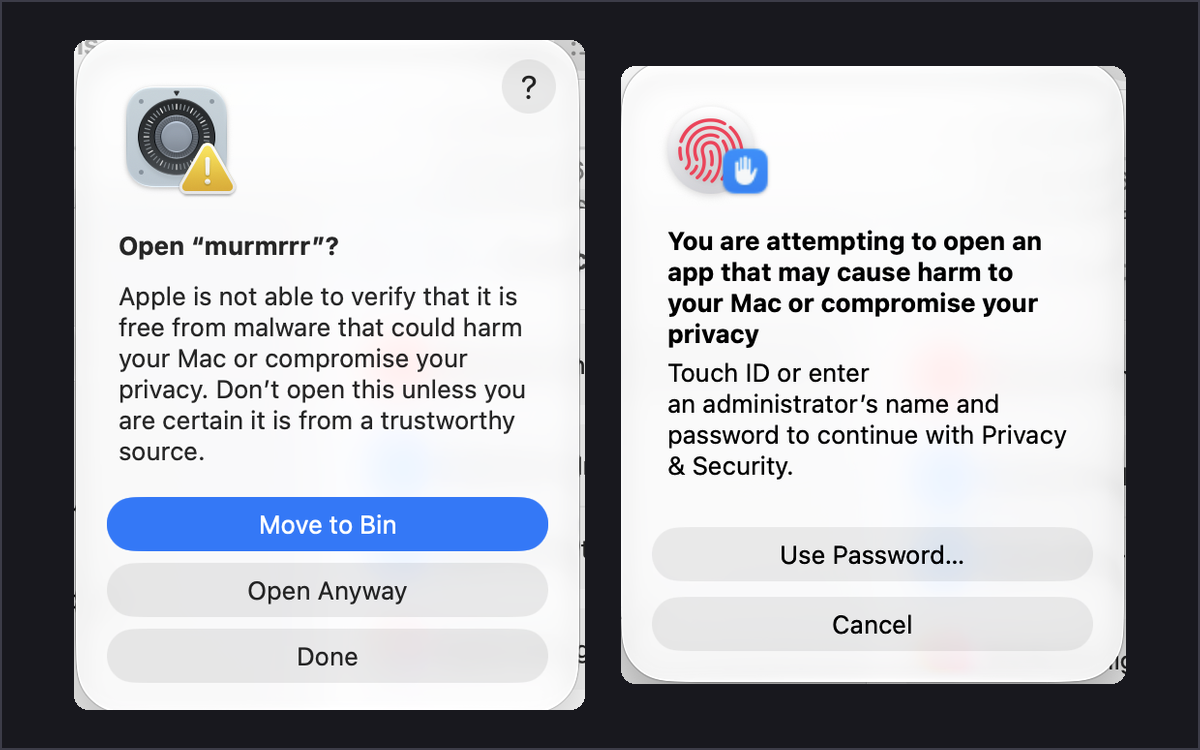
    Open Anyway: Click Open Anyway next to that message. In the box that appears, click Open Anyway again, then confirm with Touch ID or your password.
  7. Microphone

    Allow microphone access when it asks. If you missed it, turn murmrrr on under Privacy & Security > Microphone.
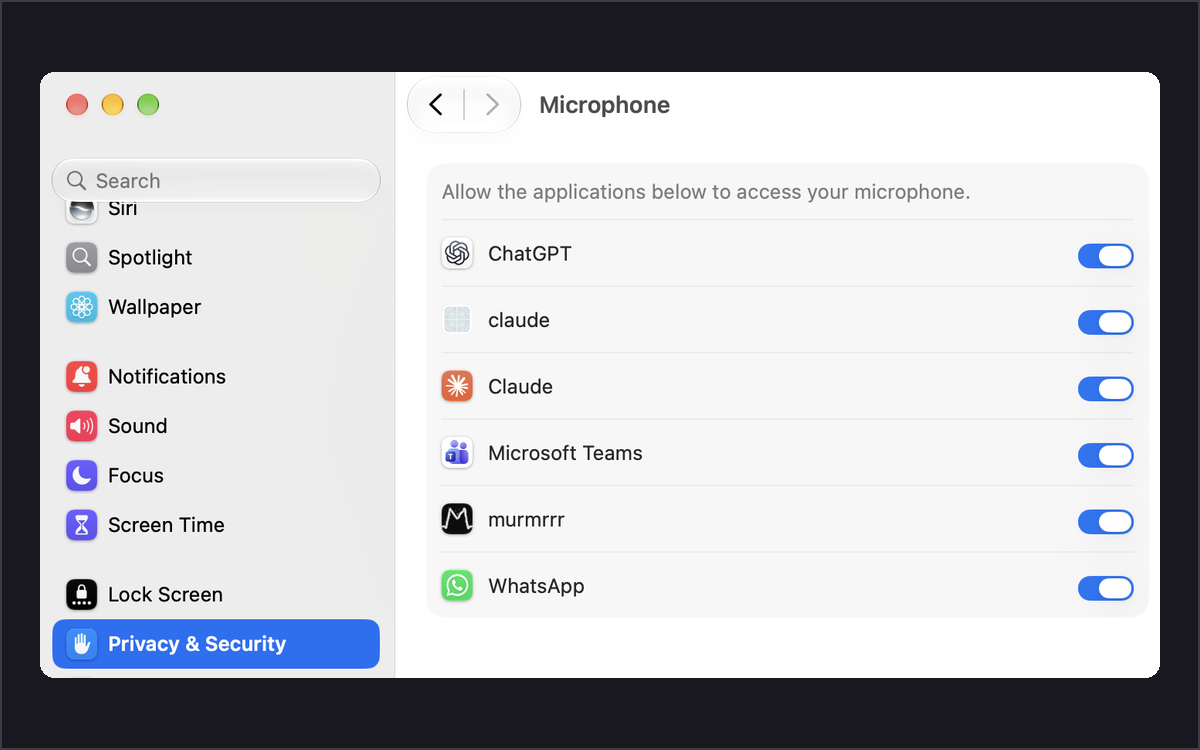
    Microphone: Allow microphone access when it asks. If you missed it, turn murmrrr on under Privacy & Security > Microphone.
  8. Device Control and Data Access

    macOS asks to let murmrrr control your Mac. Click Open System Settings, go to Privacy & Security > Device Control and Data Access (called Accessibility on older macOS) and turn murmrrr on. That's what lets it notice the hotkey and type for you. You may need to do this again after an update.
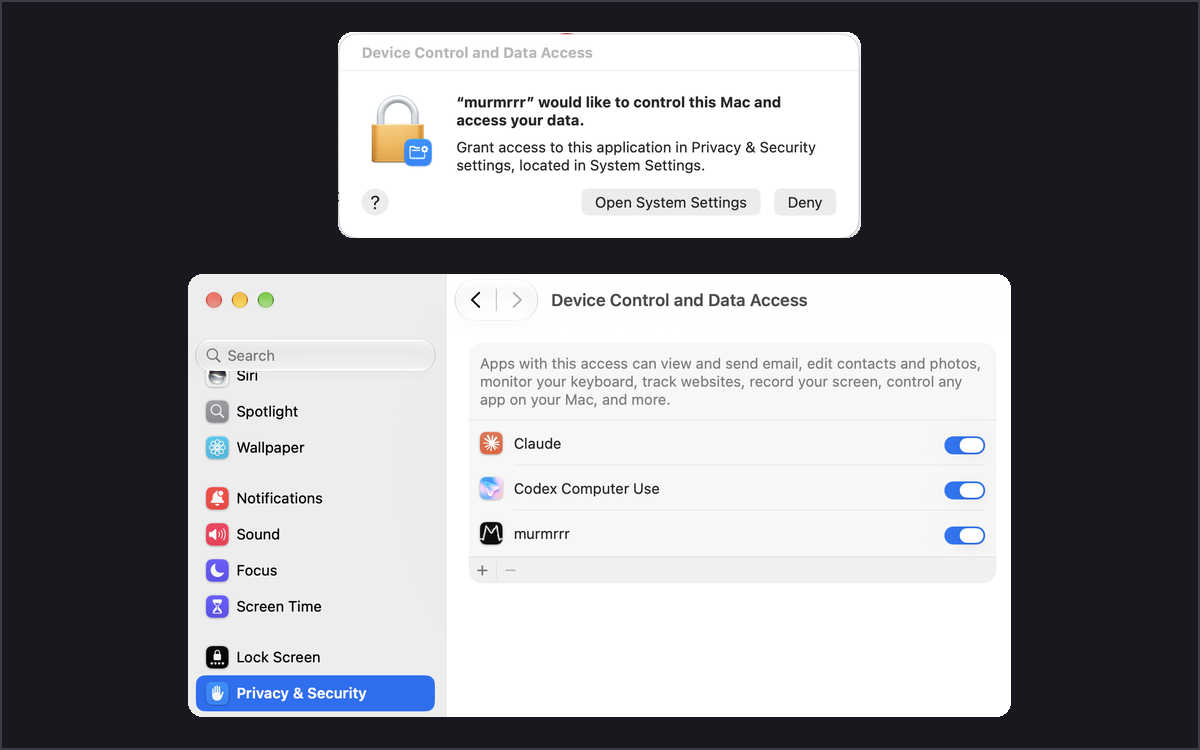
    Device Control and Data Access: macOS asks to let murmrrr control your Mac. Click Open System Settings, go to Privacy & Security > Device Control and Data Access (called Accessibility on older macOS) and turn murmrrr on. That's what lets it notice the hotkey and type for you. You may need to do this again after an update.
  9. App Management, if it asks

    macOS may also ask to let murmrrr update or delete apps, under Privacy & Security > App Management. It's fine to turn it on: murmrrr only ever touches its own app, for example when you click Uninstall.
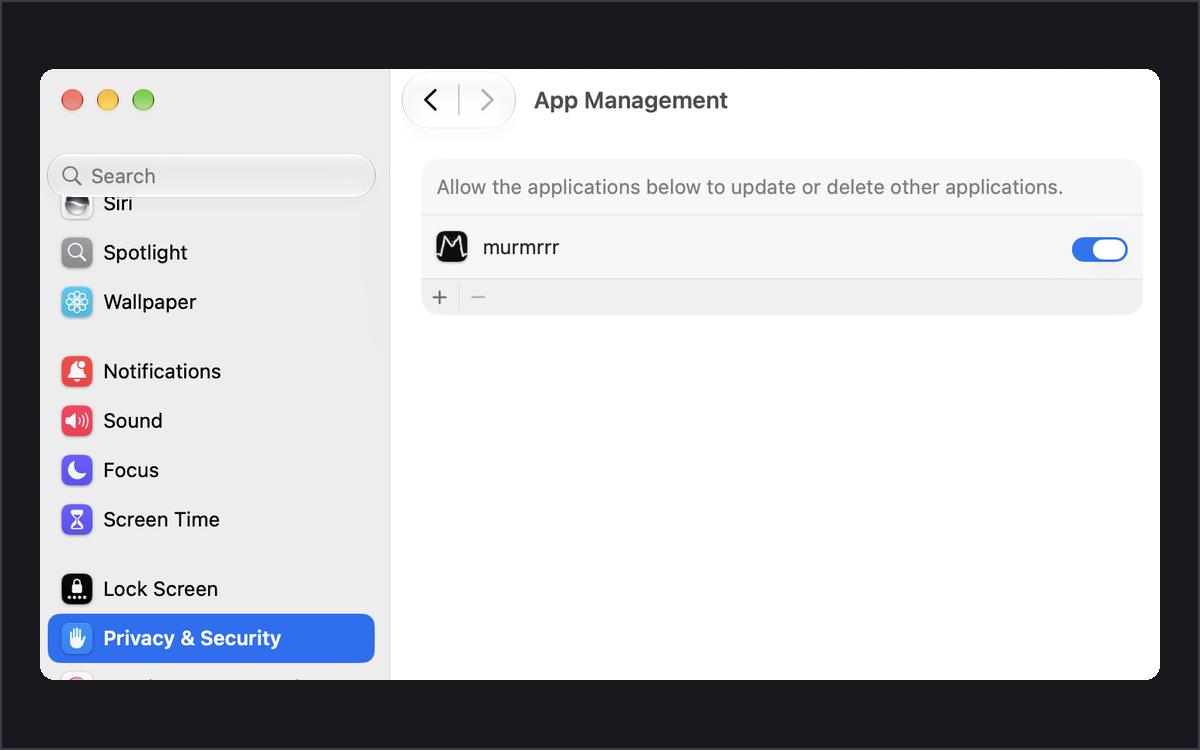
    App Management, if it asks: macOS may also ask to let murmrrr update or delete apps, under Privacy & Security > App Management. It's fine to turn it on: murmrrr only ever touches its own app, for example when you click Uninstall.
  10. The bar appears

    A small bar sits on your screen, and murmrrr lives in the menu bar. Hold Ctrl+Option and talk.
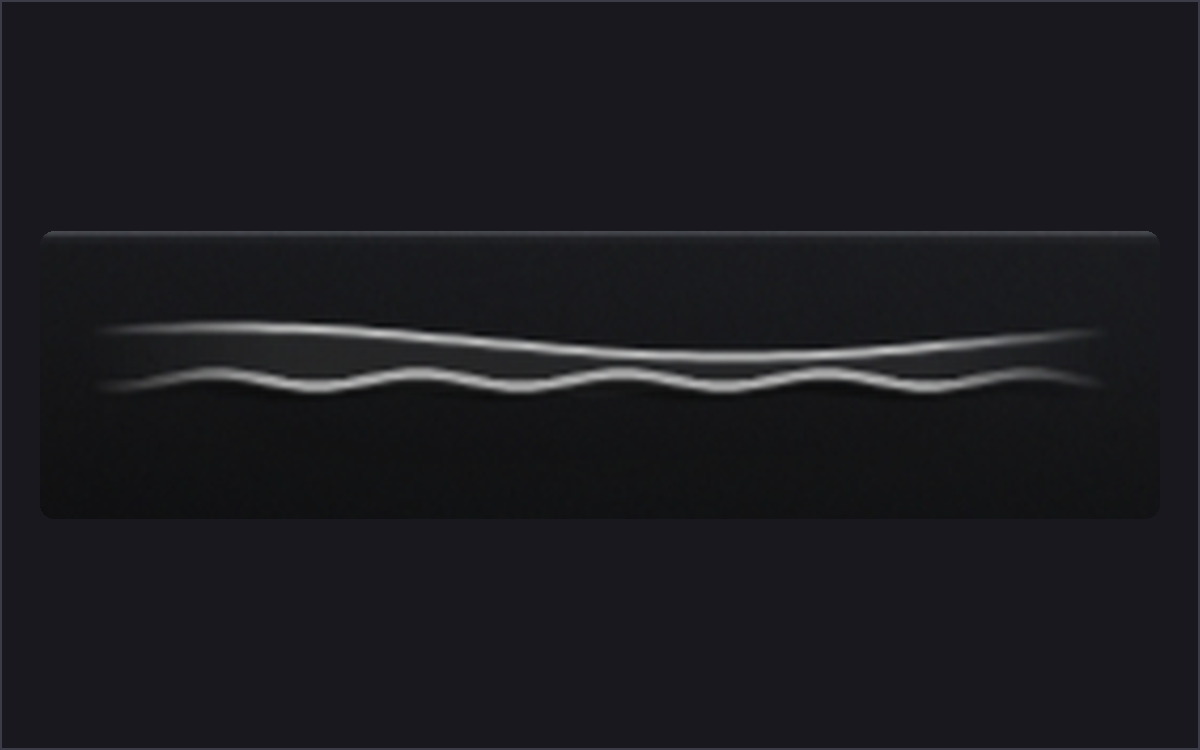
    The bar appears: A small bar sits on your screen, and murmrrr lives in the menu bar. Hold Ctrl+Option and talk.
Go to downloads